Usually, a focus group project includes several online text chat sessions. Let’s imagine we have a project with four 90-minute chats, all using the same discussion guide and the same stimuli.
- Chat session 1: January 10, starting at 5:00 pm; 5 respondents
- Chat session 2: January 10, starting at 7:30 pm; 5 respondents
- Chat session 3: January 11, starting at 5:00 pm; 5 respondents
- Chat session 4: January 11, starting at 7:30 pm; 5 respondents
There are several ways how to structure this project in Quallie:
- One project with one chat room
- One project with four chat rooms (recommended)
- Four projects, each with one chat room
You could think of even more options, but these three examples can help explain the main differences.
1. One project with one chat room
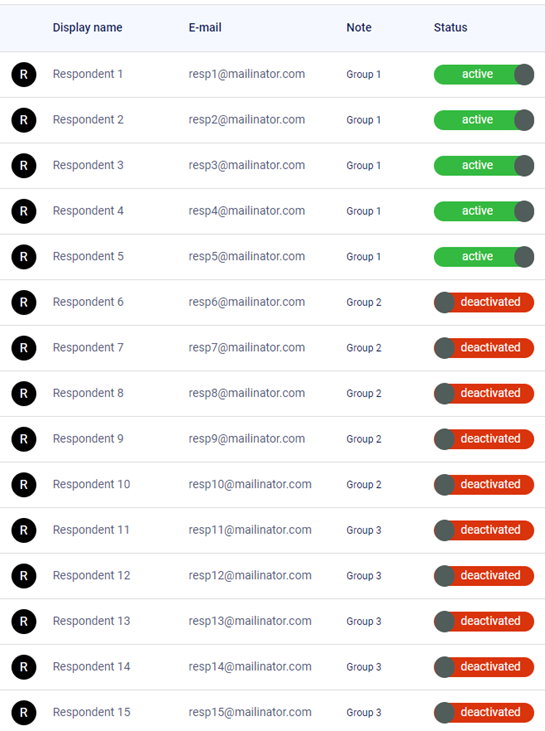
It’s the simplest project setup as everything takes place in one room (page). First you import all the respondents, then deactivate all except those selected for the current session:

In this example only respondents 1-5 can enter the project; the rest have been deactivated and are unable to join the room.
After you finish the first session, deactivate the participants of the first group and activate the participants of the second session:

Repeat this same procedure for the remaining focus groups.
As everything takes place in the same room, be careful and clear the text chat and the whiteboard before you start another session. If you don’t, the respondents may see the topics or stimuli you presented to the previous group.
If you do everything in the same room (page), the export from the text chat, polls, or other activities will be in the same file. The platform considers it as the same session. Sometimes it may be helpful; but sometimes it makes it harder to analyze the results.
2. One project with four chat rooms (recommended)
This is our favorite approach. Inside the same project, create four chat-based pages, so each session has its own chat room.

Create 4 groups of respondents, one group for each session, and assign the respondents into these groups.

Go to the ‘Session 1’ page settings and assign ‘Group 1’ to this page. Only the respondents from Group 1 will be able to enter this room. And similarly for other pages – assign Group 2 to Session 2, Group 3 to Session 3 page, and Group 4 to Session 4 page.

For example, when a respondent from Group 2 enters the project, they will automatically be redirected to Session 2. You don’t need to activate and deactivate respondents as in the first approach with one page for all sessions. Clearing the whiteboard and text chat from the previous session is also unnecessary because everything will be new and empty in separate chat rooms.
The uploaded files and whiteboard activities are shared across the whole project – there’s no need to upload them separately for each session. Upload them once, and they will appear in all sessions.
Another advantage of this project setup is that the results of each session are stored separately, so you can easily identify which session the results come from.
3. Splitting study into several projects
Sometimes splitting your study into several different Quallie projects can be helpful. For example if you have different groups of respondents with different scenarios, using many different files and activities for each group. It means if some parts of the study are not compatible with the rest, it may be better to split the groups into separate projects. This is often the case if you have a long-term study with more activities (discussion boards + chats + polls).
Sometimes it’s better to split the study into several projects for organizational reasons, e.g. by respondent’s languages, countries or customer segments.
If you aren’t sure which approach will work best for your project, we encourage you to contact us! We’ll be happy to discuss your study and help you choose the optimal setup that will fit your study goals and budget.
