Quick Start Guide
This tutorial covers the basics of setting up a project in Quallie.
1. Create a new project
2. Activities
3. Respondents
1. Create a new project
Each project involves the following parts:
- Activities: chats, video sessions, diaries, discussion boards, questionnaires, and other modules.
- Participants: respondents, moderators, clients, or visitors
- Emails: invitation, reminders, or follow-ups
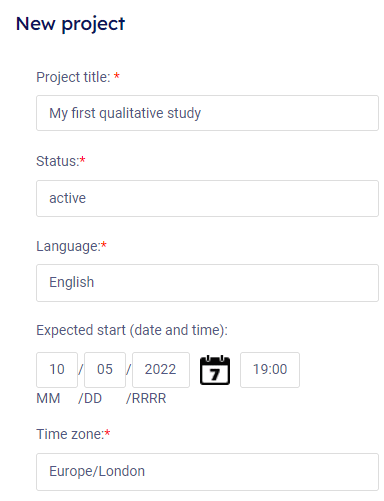
To create a project, define the basic project settings first – the project name, language, time zone and the start date. There are many other attributes in the project settings (points, consents, customization, etc.), but they are not required in the beginning.

2. Add pages with activities
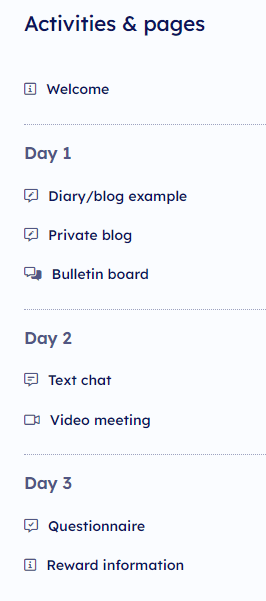
A page represents a single activity or task and appears as a separate item in the respondent’s Activity menu. You can combine different types of activities within the same project—for example, a welcome text page, a text chat, daily diary, and a final video session to conclude the study.
Available activity types (modules):
- Diary/Blog – Participants complete tasks such as submitting opinions, sharing experiences, uploading photos, recording vlogs, etc. It’s more focused on individual work, but the interaction between respondents is also possible.
- Bulletin board – A threaded discussion board for group conversations.
- Questionnaire – Respondents answer structured questions in a form.
- Text page – Used for introductions, instructions, thank-you messages, community news, or general information.
- Video chat – A webcam-based video focus group room with a moderator and respondents.
- Text chat – A live, text-based chat room between the moderator and respondents.
Page properties
Each activity (page) has its own settings, allowing you to customize various attributes.
- Page title – The name shown in the respondent’s Activity menu.
- Status – Set the page as active, closed, or configure auto-activation based on a date or completion of other tasks.
- Visibility in the menu – Choose whether the page is visible to respondents in their Activity menu.
- Visible for groups – Assign pages to specific respondent groups to show different tasks to different audiences.
- Page intro text – The task description or question displayed at the top of the page.
- Section – Group activities by days, topics, or other categories for better organization.
- Type-specific settings – Some page types include additional options, such as moderator guides or media uploads.

3. Respondents and other roles
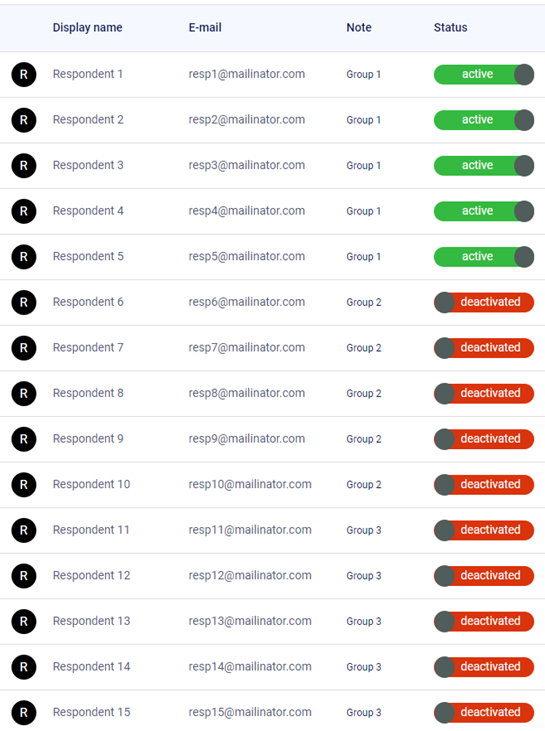
You can add respondents manually or via bulk import.
- Email – Required for sending invitations and login access.
- Display name – Shown in chats and blogs, usually just the first name. To avoid confusion, you can add an initial (e.g., Peter M.).
- Name – Internal only; used in your agenda to help identify respondents. Full names can be used here.
- Phone, gender, and other optional details – Visible only to moderators, not to other respondents.
- Group – Assign respondents to groups to show them different tasks or activities.
- Status – Active respondents can join the study. You can deactivate individuals to prevent access.
- Invitation Link – The system generates a unique login link for each respondent.
Moderators, clients, visitors
Moderators – The account owner and team members are moderators by default, so there’s no need to add them manually. Additional moderators can be assigned at the project level—they will only have access to the specific projects they are assigned to (unlike account owners or team members, who can access all projects).
Clients & visitors – You can invite clients to observe the study. Moderators can communicate with them through a separate, private chat window.
Invite respondents
Inform your respondents when your projects starts and send them their unique link to your project.
Collabito can send the emails for you:
- Go to Emails (in the project menu)
- Add new campaign
- Select recipients and click the Create campaign button.
- Set up the email. Use the the automation tag {url_project_login} in the text and Quallie will replace it with the correct URL and password for each recipient automatically.
Please note that if you send emails and use your address as a sender, some email systems can flag these emails as spam. Don’t forget to test it before you send the bulk email to respondents.

Do you want to learn more?
We’ve prepared several tutorials to help you get started with Quallie. Visit the Tutorials section Tutorials section to explore all available learning resources.
- how to set up a new project
- how to moderate live chat session
- how to moderate diaries and bulletin boards
- how to send email invitations
- and more
